
If your Paving or Patio needs a good clean over the next few days, then check out these 5 simple steps that will help you get the job done properly and effectively and which won’t break the bank either. We have put together a series of 5 simple but detailed steps that you can follow along with a series of videos that you can view also if you need to see it in action from various different paving cleaning jobs that hopefully can steer you in the right direction.
Introduction
Having an attractive, sleek and clean patio or driveway makes your home look so much better and it helps a great deal when you invite friends or family over for a few drinks or a BBQ. Some paving is more difficult than others to maintain but this quick guide should provide you with enough tips to keep your patio maintained for years to come. The first thing to do is to gather up the various tools required for the job as outlined below.
Read also: Our Driveway Paving review here
Suggested Tools and Materials needed for Paving Cleaning:
- Weed killer (if they exist in the joints or borders)
- Powdered Detergent (if moss exists)
- Bucket, washing up liquid and warm water
- Or a watering can (for better application of the solution)
- Bleach or Baking soda (if heavy stubborn stains exist on the slabs)
- Strong bristled brush (for the joint areas, avoid wire brushes as they will damage the slabs)
- Pressure Washer (if the paving area is too large)
- Protective gloves (or disposable gloves) with appropriate clothing and boots
- Patio Paving Sealant (check out our Sealant review here)
- Masonry paint brush or roller (for the Sealant application)
- Paint tray (for pouring in the sealant)

Steps in Cleaning you Patio or Driveway Paving
Step 1: Remove all Weeds & Debris
Get a good strong brush and clear away any debris on the patio paving and clear away all the weeds. If your weed problem has gone out of control, then apply a weed killer solution spray in the joint areas to ensure the root of the weeds are killed off. Any moss or debris between the joints should be removed using a mini hand trowel or a wire brush. Once the surface is completely cleared, it is now ready for cleaning. If you have applied weed killer, then please allow up to 5 days for this to take effect to reach the root before you move onto the next step.
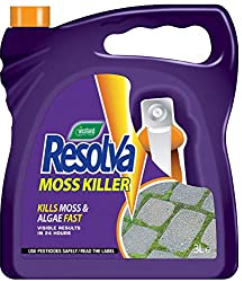
Likewise, if you have a moss problem, apply a sprinkle of detergent across the moss and let it sit for a few days until it has turned brown – then brush it off with a stiff brush. Any joints that need to be repaired should also be done at this point be it mortar, or a silica based jointing solution.
View Also: Popular Weed Killers

Available @ Amazon
View Also: Popular Moss Treatments
Available @ Amazon
Step 2: Preparation of Warm Water & Detergent
Using a mild washing up liquid will work just fine in most cases and mix it with warm water to generate a lather in a bucket. Avoid cleaning agents that contain any acid as they are likely to cause further stains especially on concrete type paving. If you have paving and it has heavy duty stains that cannot be removed, then apply some localised bleach to the water of the affected areas and allow it to soak overnight.
Using Bleach for Stubborn stains
To remove really stubborn stains, bleach will do the trick, but you will need to mix it as 1 part bleach to 5 parts water to manage it. Bleach can cause coloured natural stones or concrete slabs to fade so it should be used minimally and used as a spot treatment only on heavy duty stains. You can also use the bleach to kill the weeds and the weed roots in the joints also but again you need to be careful with the application and use it as spot treatments only. If you wish to avoid using chemicals such as bleach, then make up a mixture using vinegar or baking soda in particular which work great also as cleaning agents.

Read also: Our Indian Sandstone Paving Review here
Step 3: Start Scrubbing
Use a stiff brush and start scrubbing the paving but be careful not to damage the exterior of the paving slabs. If the area is far too big for a brush, then invest in a jet-wash pressure washer and add in the warm water and washing up liquid to it and then set to medium pressure – adjust the pressure as required. You will still need to brush down after the pressure washer, but the pressure washer should be able to clear away most of the dead moss, debris and stains. This is the hardest part on your arms and hands so you may need to carry this out in stages or set out different areas one by one and complete it that way. You should allow it to soak for 1 hour before hosing it down.
Step 4: Rinsing
Once the scrubbing and cleaning is complete with the brush or pressure washer, you now need to clear away the paving by rinsing or hosing it down with clear water or use a clear clean pressure washer with clean water which will clear all the excess detergent away. When using the sprayer, avoid setting the nozzle at the high-pressured single jet spray and instead use the lower powered lance or a fan spray. Once it is all rinsed down, allow it to dry out completely for a few days.
View Also: Popular Pressure Washers

Available @ Amazon
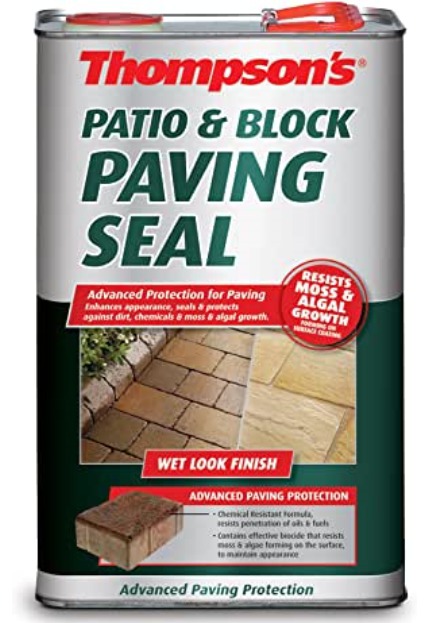
View Also: Popular Sealants
Available @ Amazon
Step 5: Apply a Sealant
Once completely dry after a few days from the pressure washer or scrub, you should look at sourcing a reliable patio or block paving sealant to prevent further algae, stains, residues from setting in which in turn also protects the appearance of the slabs for longer and stops the colours from fading away – check out our Sealant review here.
Usually 2 coats are required, and you should wait a minimum of 12 hours between sealant coat applications and this sealant can be applied with a normal paint brush or even a long pile roller brush for larger areas. One tip though when applying the sealant is to plan an exit strategy as you don’t want to end up cornering yourself with no way to get out!
Advantages of Using a Sealant
Some people will be nervous about using sealant on natural sandstone so you should spot check a sample slab before you cover the entire area to avoid a potentially big mistake. Once you have decided on the sealant brand you will use, you will immediately see the benefits of having the sealants applied across the patio.
It acts as a film protector (some give a wet look) and prevents any moisture or water seeping through and it prevents any algae, stains, fuel stains or dirt spots setting in as well as giving it a layer of protection against poor weather conditions. Make sure also to avoid little ponds or puddles from developing in crevice’s by giving it a second brush through.
Ongoing Maintenance
You should get into the habit of giving your patio paving a quick going over once per month be it a sweep down to get rid of any dirt build ups or give it a quick hose down with a pressure washer on a medium pressure setting. Regular monthly cleaning will keep it looking better for longer and it prevent the build-up or eye sore stains that can set in over time. A thorough clean should only be needed once per year with just a quick clean over then once every month or even once every second month. Once the sealant is applied with 2 coats, then you should only need to re-apply the sealant again every 2 to 4 years.
Read also: Our review for the Best Paving Slabs in the UK here
Educate Others?
Have you any special tips yourself that you can share when it comes to cleaning your driveway or patio paving?
If possible, please share and let us all know by leaving a comment in the comment box section provided below – so that others across the UK community can learn also!


View Visitor Feedback